Choosing an Inflatable Boat Platform in 2026 requires more than comparing prices and glossy product photos. Water conditions, passenger weight, storage space, and transport habits all affect the right decision.
A platform may look stable beside a calm marina, yet behave differently in wind or small waves. Experienced boaters usually inspect fabric thickness, seam quality, valve design, and deck stiffness before checking extra accessories. Drop-stitch construction can improve rigidity, but it may also increase weight and repair complexity. Think carefully.
Real-world testing matters. Place the inflated platform on a level surface, check for uneven pressure, and examine every connection point. A reliable model should include clear load ratings, maintenance instructions, and accessible replacement parts. Manufacturer claims deserve attention, but they should not replace independent reviews or guidance from qualified marine professionals.
In 2026, smart buyers should also consider portability and responsible use. Measure your vehicle, storage area, and launch route before ordering. A heavy platform can become frustrating after repeated carrying, even when it performs well on water. That detail is easy to miss.
No single design fits every trip. A fishing platform may need quiet movement and attachment points, while a family platform may prioritize stability and generous space. Personal experience helps, but it can also create bias. Recheck your assumptions against current specifications, safety guidance, and local waterway requirements. The best choice balances performance, durability, comfort, and honest limitations.
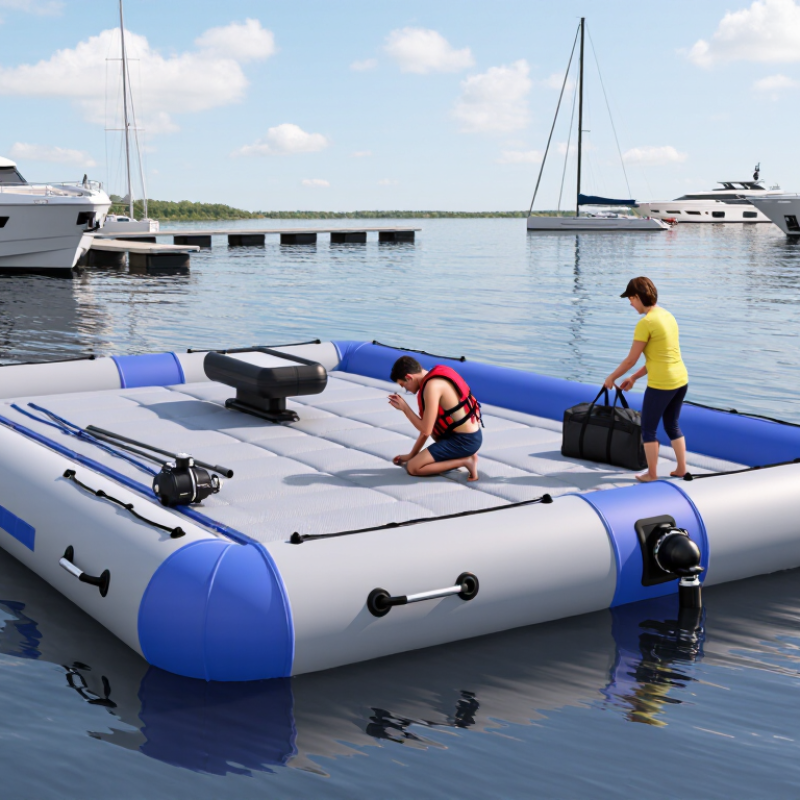
How to Choose an Inflatable Boat Platform in 2026
An inflatable platform should match its certified use, not only its deck size. ISO 6185 classifies inflatable boats through length, construction, and propulsion requirements. Check the applicable section before comparing floor layouts or tube diameters. A 3.2-metre platform may feel spacious beside a dock, yet become crowded with four adults, a motor, fuel, and safety equipment.
CE load ratings provide the practical limit. The capacity plate should state maximum persons, total load, and often maximum engine power. Total load includes passengers, luggage, fuel, batteries, and the motor. It is not a comfort estimate. A 2023 NMMA U.S. Recreational Boating Statistical Abstract recorded approximately 11.6 million registered recreational boats, showing how common small-watercraft use has become. However, registration numbers do not prove that every platform suits family transport or fishing. Real use remains more specific.
Tips: Measure the heaviest items first. Leave free floor space around the fuel container. Compare the ISO 6185 length category with the CE plate, then reduce the rated load for rough water. A simple test helps: place filled bags on the deck before buying. I still find this easy to underestimate. Wet tubes, shifting passengers, and a short chop can change handling quickly. Also inspect the plate, valves, seams, and repair history. A high capacity number means little when the floor flexes excessively or the equipment is poorly distributed.
Choosing between 0.9–1.2 mm PVC, Hypalon, and drop-stitch construction depends on water conditions, transport, and maintenance habits. I have found that 0.9 mm PVC suits sheltered lakes and occasional use. It stays relatively light and folds easily. However, sharp gravel, hot decks, and repeated dragging can expose its weaknesses. The thicker 1.2 mm PVC feels tougher, but it adds weight and still needs careful storage.
Hypalon, commonly associated with CSM-coated fabric, performs better under intense sunlight, saltwater, and frequent handling. Its surface usually tolerates abrasion and temperature changes well. Repairs can be more demanding, and the material often costs more. A neglected Hypalon boat still fails. That part is easy to forget. Check seams, valve areas, and rubbing strips before every launch, especially after long storage.
Drop-stitch construction uses thousands of internal threads to hold flat, high-pressure panels. The result feels firm underfoot, almost like a solid platform, which helps with fishing, boarding, and cargo movement. It can also pack smaller than expected. Yet, punctures, overpressure, and poorly protected edges remain concerns. I would not choose drop-stitch flooring only because it feels rigid in a showroom. Test inflation time, valve access, and loaded stability. A platform that is awkward to carry may stay at home more often than planned.
A reliable inflatable boat platform starts with its floor pressure. Look for drop-stitch construction rated around 6–8 psi. This pressure helps the deck remain firm under footsteps, coolers, and shifting equipment. A soft floor can feel unstable, even when the tubes look fully inflated.
Use a pressure gauge rather than judging firmness by hand. I have tested platforms that felt hard but were still below their recommended pressure. Temperature also matters. A platform inflated in cool morning air may become tighter under direct sunlight. Check it again before use, and follow the supplied inflation limits. Do not exceed them to gain extra stiffness.
Published weight capacity deserves equal attention. Check whether the figure includes passengers, equipment, and the platform itself. Then leave a practical margin for movement and uneven loading.
A platform rated for 600 pounds should not routinely carry 590 pounds in real conditions. That leaves little room for wet gear or unexpected passengers.
I once underestimated the weight of batteries and a storage box, which changed the platform’s balance noticeably. The rating was accurate; my planning was weak. Look for clear capacity testing information, usable dimensions, valve quality, and repair materials. A rigid-feeling deck is helpful, but it cannot correct poor weight distribution or overloaded tubes.
How to Choose an Inflatable Boat Platform in 2026
Choosing an inflatable boat platform begins with its air-chamber layout. Compare three to five designs before buying. Separate chambers can keep part of the platform buoyant after one section loses pressure. A single large chamber may feel simpler, but it offers less backup. I prefer layouts with independent side tubes and a reinforced floor. They feel steadier when passengers shift weight near the edge.
Valve design deserves practical attention. Test whether each valve opens smoothly and seals without twisting. Large valves inflate faster, but they may release air suddenly during maintenance. Look for protected valve positions that avoid contact with paddles, ropes, and rough docks. Pressure indicators are useful, although they can become inaccurate in direct sunlight. Check pressure again after the platform sits in cold water.
Tips: Press each chamber before use. Listen for slow leaks. Carry a repair kit, spare valve parts, and a manual pump. Do not rely only on visual inspection. Puncture safety depends on layered fabric, welded seams, and rounded reinforcement around high-contact areas. Dragging the platform over gravel is still a bad idea. I once trusted a thick-looking floor and ignored a tiny seam wrinkle; that mistake caused a slow leak later. Inspect seams, handles, and floor edges every trip. Safety ratings help, but careful habits matter more.
| Air-Chamber Layout | Typical Use | Stability and Handling | Valve Arrangement | Puncture Safety | Main Advantages | Main Limitations |
|---|---|---|---|---|---|---|
| 3 chambers: two side tubes + inflatable floor | Short recreational trips, sheltered water, fishing, and compact transport | Good basic stability; the flexible floor provides less rigidity than a high-pressure or rigid floor | At least one separate valve for each chamber; wide-opening inflation valves reduce setup time | Loss of one chamber may leave partial buoyancy, but the remaining chambers may not support normal trim or capacity | Lightweight, affordable, simple to inflate and repair | Lower load capacity and less resistance to twisting in waves |
| 3 chambers: two side tubes + separate keel | General boating, rowing, and occasional use in moderate conditions | The keel improves directional tracking and helps form a more defined hull shape | One valve per side tube plus a separate keel valve; valves should be accessible when the boat is inflated | Separate side-tube chambers provide useful redundancy; a keel puncture mainly affects tracking and ride height | Improved tracking without the weight of a rigid hull | The keel adds inflation time and requires an additional inspection point |
| 4 chambers: two side tubes, floor, and keel | Frequent recreation, coastal inshore use, and boats carrying heavier loads | Better shape retention, load distribution, and directional control than a basic three-chamber layout | Four independently isolatable valves; protected valve recesses help prevent impact and abrasion damage | A single leak is less likely to cause immediate total buoyancy loss; continue to shore and repair as soon as possible | Balanced compromise between redundancy, stability, weight, and setup time | More seams, valves, and maintenance points than a simpler layout |
| 5 chambers: multi-cell tubes + floor + keel | Longer trips, larger crews, utility use, and changing water conditions | High redundancy and improved trim control; separate tube cells can reduce the effect of a localized leak | Five separate inflation and deflation paths; clearly labeled valves are important for correct setup | Strongest buoyancy redundancy among the layouts listed, but it does not make the boat puncture-proof | High reserve buoyancy, better load management, and greater tolerance of one damaged chamber | Highest setup time, more hardware to inspect, and usually greater packed size and weight |
| High-pressure drop-stitch floor with 3–5 chambers | Activities requiring a firm standing surface, such as fishing, photography, or equipment handling | Rigid-feeling floor improves walking comfort and load distribution; the floor still requires correct pressure | Separate high-pressure floor valve plus independent tube and keel valves; a pressure gauge is recommended | Multiple chambers preserve redundancy, while floor damage can reduce stiffness and should be treated as a safety issue | Firm deck, efficient packing compared with many rigid floors, and good support for onboard movement | Sensitive to sharp objects, overinflation, heat-related pressure changes, and incorrect pressure readings |
Choosing an inflatable boat platform in 2026 requires more than comparing deck size and advertised load capacity. During inspections, I check the NMMA certification details and confirm whether they match the actual model. A logo alone is not enough. Ask for the certificate, testing scope, and current documentation.
For European use, examine the CE marking, declaration of conformity, and technical file references. These documents should identify the applicable safety requirements clearly. Do not rely on a cropped online photograph. It may be outdated. I also test the warranty conditions in practical terms. Check coverage periods, excluded damage, transport costs, and whether labor is included. A long warranty can still be weak.
Repairability matters on the water. Look for replaceable valves, accessible seams, standard fittings, and repair instructions. Ask how quickly common parts can be supplied in 2026. Then calculate the total cost, not just the purchase price. Include an electric pump, battery, storage, cleaning, inspection, repairs, and seasonal transport. A cheaper platform may need frequent patching. That changes the real calculation. I once underestimated storage costs by nearly a quarter because I ignored drying space and protective covers. That mistake still influences my buying checklist. Leave room for uncertainty. Supplier fees and repair prices can change during the season. A written quote is safer than a confident sales promise.